 Save
Save My cousin showed up one afternoon with a tray of these, and I watched them vanish in under ten minutes. The combination of that snap from the cereal, the marshmallow chew, and the chocolate shell was so simple it almost felt like cheating. I made my first batch that same week, standing at the stove with a wooden spoon, realizing how satisfying it is when something this easy tastes this good. Now they're my go-to whenever I need to impress without breaking a sweat.
I brought a batch to a potluck once, stacked on a plate with parchment between the layers. A neighbor asked if I'd bought them from a bakery, and I just smiled. The truth is, I'd made them in my pajamas an hour before leaving, and they still looked like something from a dessert case. That's the magic of a good chocolate coating: it hides all evidence of how quick and forgiving this recipe really is.
Ingredients
- Unsalted butter (6 tablespoons, plus extra for greasing): This is what melts the marshmallows into that glossy, stretchy base, and a little extra on your hands or spatula keeps everything from sticking.
- Mini marshmallows (1 package, 10 ounces): They melt faster and more evenly than the large ones, giving you a smooth, cohesive mixture without lumps.
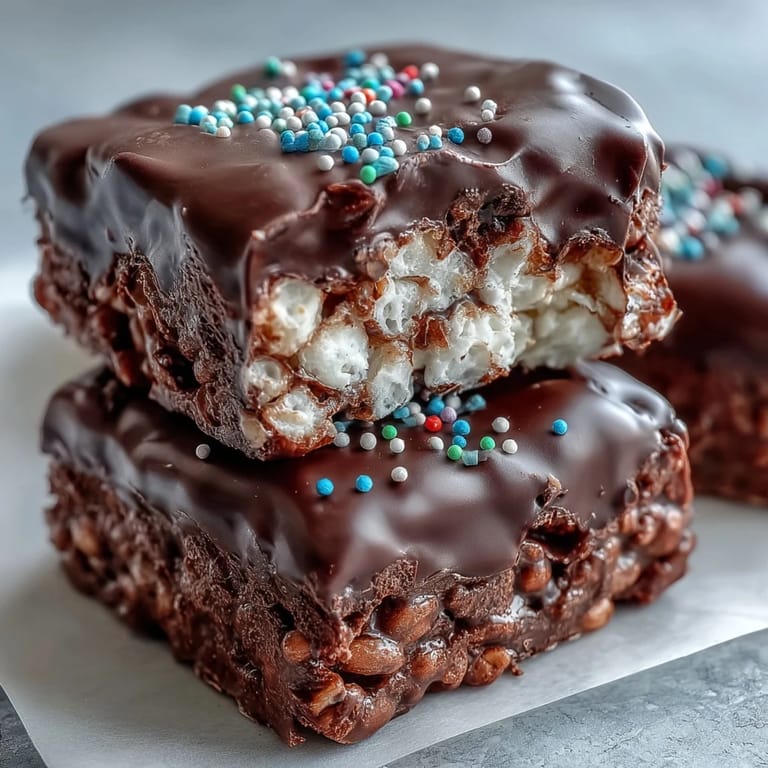
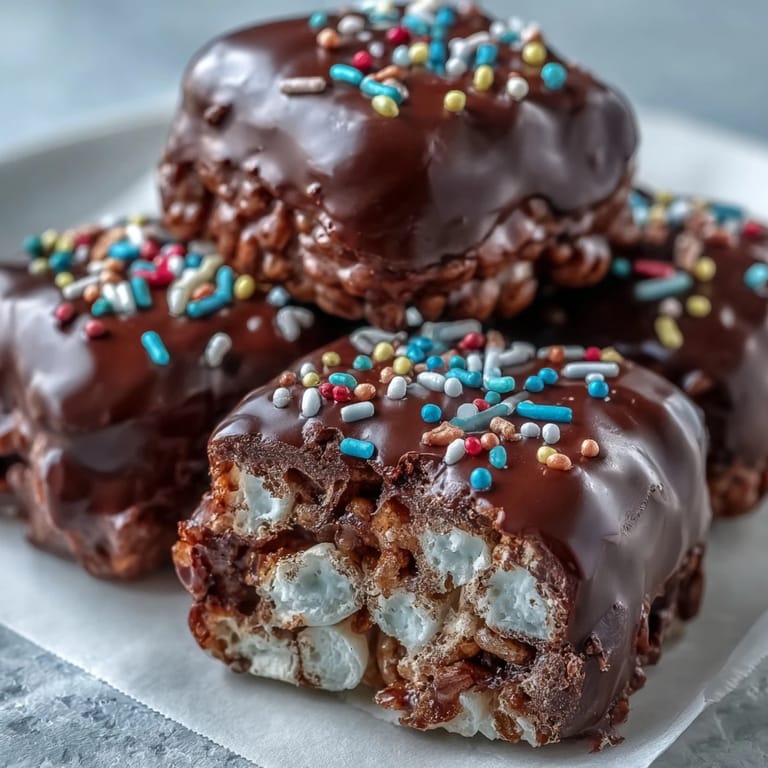
- Rice Krispies cereal (6 cups): The star of the show, providing that signature snap and airy texture that makes every bite so satisfying.
- Fine sea salt (¼ teaspoon, optional): A tiny pinch cuts through the sweetness and makes the chocolate and marshmallow flavors pop in a way you'll notice.
- Semisweet or dark chocolate chips (1 ½ cups): This creates the glossy shell that turns a simple treat into something bakery-worthy, and the slight bitterness balances the sweet base.
- Vegetable oil or coconut oil (1 teaspoon): Just a touch helps the chocolate spread smoothly and gives it a beautiful sheen once it sets.
- Rainbow sprinkles or chopped nuts (2 tablespoons, optional): These add color, crunch, and a bit of personality, whether you're going festive or sophisticated.
Tired of Takeout? 🥡
Get 10 meals you can make faster than delivery arrives. Seriously.
One email. No spam. Unsubscribe anytime.
Instructions
- Prep your pan:
- Lightly grease an 8x8-inch or 9x9-inch square baking pan with butter, making sure to get into the corners. If you want an easy lift later, line it with parchment paper and grease that too.
- Melt the butter:
- In a large saucepan over low heat, melt the 6 tablespoons of butter, stirring constantly so it doesn't brown or separate. Keep the heat gentle and patient.
- Add the marshmallows:
- Toss in the mini marshmallows and stir continuously until they melt into a smooth, glossy pool. This usually takes about 3 to 5 minutes, and you'll know it's ready when there are no lumps left.
- Season the mixture:
- Remove the pan from heat and stir in the sea salt if you're using it. This is also the moment to add vanilla extract if you want a little extra warmth.
- Fold in the cereal:
- Add the Rice Krispies and gently fold with a spatula until every piece is coated in marshmallow. Work quickly but carefully so you don't crush the cereal.
- Press into the pan:
- Transfer the mixture to your prepared pan and use a buttered spatula or lightly greased hands to press it evenly and firmly into every corner. Don't pack it too hard, or the treats will be dense.
- Let it rest:
- Allow the layer to sit at room temperature for about 10 minutes so it firms up just enough to hold the chocolate.
- Melt the chocolate:
- In a microwave-safe bowl, combine the chocolate chips and oil, then microwave on medium power in 30-second intervals, stirring after each, until the mixture is smooth and glossy. Don't rush this or the chocolate can seize.
- Pour and spread:
- Pour the melted chocolate over the cooled Rice Krispy layer and spread it evenly with an offset spatula or the back of a spoon. Work quickly while the chocolate is still fluid.
- Add toppings:
- Immediately sprinkle with rainbow sprinkles or chopped nuts if you're using them. The chocolate needs to be wet so they stick.
- Set the chocolate:
- Allow the treats to set at room temperature for at least 1 hour, or refrigerate for 20 to 30 minutes until the chocolate is completely firm and no longer tacky.
- Cut into bars:
- Once set, lift the block from the pan using parchment overhang if you used it, or invert onto a cutting board. Cut into 12 to 16 bars with a sharp knife, wiping the blade between cuts for clean edges.
 Save
Save I remember cutting the first batch into uneven squares, chocolate still a little soft, and eating one standing at the counter. The way the chocolate cracked under my teeth and gave way to that airy, marshmallow-bound cereal felt like rediscovering something I'd loved as a kid but forgotten. It's funny how a simple treat can bring back that kind of uncomplicated joy.
How to Store and Keep Them Fresh
Once the chocolate has fully set, stack the bars in an airtight container with parchment or wax paper between the layers to keep them from sticking. At room temperature, they'll stay crisp and fresh for up to three days, though in my house they rarely last that long. If you want to extend their life, refrigerate them for up to a week, but let them sit out for a few minutes before serving so the chocolate isn't too hard.
Flavor Variations to Try
I've swapped the semisweet chocolate for white chocolate and topped it with pastel sprinkles for a baby shower, and it looked like something out of a bakery window. You can also drizzle melted peanut butter over the chocolate layer, or stir a handful of mini chocolate chips into the cereal mixture before pressing it into the pan. For a grown-up twist, sprinkle a tiny pinch of flaky sea salt over the wet chocolate, and the contrast will make every flavor sing.
Troubleshooting Common Issues
If your marshmallow mixture turns out too stiff, you probably cooked it over heat that was too high or for too long. Next time, keep the flame low and remove the pan as soon as everything is smooth. If the chocolate doesn't set even after an hour, it might be too warm in your kitchen, so pop the pan in the fridge for 20 minutes. And if your bars fall apart when you cut them, you likely didn't press the cereal mixture firmly enough into the pan.
- Use a hot, dry knife for the cleanest cuts, wiping it between slices.
- If the chocolate cracks when you slice, let the bars sit at room temperature for a few minutes to soften slightly.
- For perfectly even bars, measure and mark your cuts with a ruler before slicing.
 Save
Save There's something deeply satisfying about pulling off a treat that looks this polished with so little fuss. Whether you're making them for a crowd or just because you need something sweet on a rainy afternoon, these bars deliver every time.
Recipe Q&A
- → How long do chocolate covered Rice Krispy treats stay fresh?
Store in an airtight container at room temperature for up to 3 days, or refrigerate for up to a week. The chocolate may develop a slight bloom when refrigerated but will still taste delicious.
- → Can I use white chocolate instead of semisweet?
Absolutely! White chocolate works beautifully and creates a lovely contrast with the golden crispy base. Add pastel sprinkles for a festive variation perfect for holidays and baby showers.
- → Why add oil to the chocolate?
The vegetable or coconut oil helps the chocolate melt smoothly and creates a glossy finish. It also makes the chocolate layer slightly softer, making it easier to cut through without cracking.
- → Should I press the mixture firmly or lightly?
Press firmly and evenly into the pan using a buttered spatula or hands. This ensures the bars hold together well when cut, but be careful not to compress too tightly or they'll become dense rather than crispy.
- → Can I make these ahead of time?
Yes! These treats actually improve after resting for a few hours as the flavors meld. Make them up to 24 hours before serving, or freeze uncut portions for up to 3 months and thaw at room temperature.
- → What's the best way to cut clean squares?
Let the chocolate set completely at room temperature or in the refrigerator. Use a sharp knife warmed under hot water and wiped dry between cuts for the cleanest edges. Lift the entire block out using parchment overhang for easier cutting.